
Gel eyeliner, the unsung hero of the makeup world, has come to rescue us from the dreaded raccoon eyes and uneven wings. If you've ever found yourself in a battle with your liquid or pencil liner, you'll be ecstatic to learn how this magical little pot can revolutionize your eye makeup game.
Gel eyeliner, that mysterious little makeup gem, might seem intimidating at first. But trust us, once you master it, you'll be left wondering how you ever survived without it! This smooth operator glides on effortlessly, delivering a pop of intense color to make your eyes truly mesmerizing. And the best part? No smudging or budging here – your fabulous eye makeup will stay put, dazzling everyone all day long. Time to embrace the gel eyeliner magic!
In this article, we'll unwrap the secrets of gel eyeliner, giving you the lowdown on its long-lasting, smudge-proof powers. Stay with us as we share pro tips on nailing that perfect wing, experimenting with versatile looks, and transforming you into a gel eyeliner aficionado. Say adieu to eyeliner woes and hello to fierce, flawless lines!
Choose the Right Formula
Heads up, gorgeous: Not all gel eyeliners are made the same! With a universe of formulas out there, it's time to find your perfect match. Blessed with sensitive eyes? A hypoallergenic formula will treat them like royalty. In search of a long-lasting companion for those makeup marathons? Waterproof gel eyeliner is your new bestie! And, if you're after the ultimate multitasker, grab a dual-ended product that features both a brush and a built-in applicator – it's the superhero of eyeliners!
Picking the Perfect Brush for Your Gel Eyeliner
Once you’ve found the right formula, it’s time to choose the perfect brush. A bent liner brush will give you more control as you apply the gel eyeliner while a flat liner brush will deposit more color in one swipe. If you’re just starting out, we recommend going with a bent liner brush since it will be easier to maneuver. As you become more comfortable with applying gel eyeliner, feel free to experiment with different types of brushes until you find your perfect match!
The right brush can make all the difference when applying gel eyeliner. Here are some factors to consider when choosing your ideal brush:
1. Brush Shape
There are several brush shapes available, each designed to provide a unique application experience. Here are a few popular options:
- Bent liner brush: This brush features a slight angle, giving you more control as you apply gel eyeliner. It's perfect for beginners looking for easy maneuverability.
- Flat liner brush: If you're after bold color in a single swipe, this brush is your go-to. Its flat shape deposits more color with each stroke, making it perfect for more dramatic looks.
- Fine-tipped eyeliner brush: For those who crave precision, a fine-tipped brush offers ultimate control and accuracy. This brush is ideal for creating intricate designs or ultra-thin lines.
2. Bristle Type
When it comes to bristle type, synthetic bristles are often recommended for gel eyeliner application. They tend to hold up better when used with creamy gel formulas and offer a smoother glide across the skin.
3. Comfort and Control
Choose a brush that feels comfortable in your hand and allows you to maintain control during application. A brush with a longer handle may provide better balance, while a shorter handle may offer increased precision.
4. Experimentation is Key
As you become more comfortable with applying gel eyeliner, don't be afraid to experiment with different types of brushes. You may find that a specific brush shape or bristle type works best for your unique eye shape or preferred eyeliner style.
Picking the perfect brush is crucial for achieving a flawless gel eyeliner application. By considering factors such as brush shape, bristle type, and comfort, you'll be well on your way to finding your dream brush and creating stunning eye looks that leave a lasting impression.
Lay the Perfect Gel Eyeliner Foundation!
Ready to rock that gel eyeliner? First, let's create a flawless canvas! Begin with an oil-free primer and foundation for a silky-smooth and matte complexion. Remember, oils are like naughty kids that make your gel eyeliner go slip-sliding away – so keep 'em at bay! Once your primer and foundation are in place, seal the deal with a translucent powder to lock it down like a boss. Now you're ready to let that gel eyeliner shine!
Prepping Your Eyes for Application
Gel eyeliner is a makeup game-changer and has quickly become a favorite among beauty enthusiasts. This versatile product allows for precise application, long-lasting wear, and bold eye looks that are sure to turn heads. In this article, we'll explore how to prep your eyes for gel eyeliner application, ensuring a smooth and flawless result every time.
Before diving into the world of gel eyeliner, it's essential to prepare your eyes for a seamless application. Here are some crucial steps to follow:
Step 1: Cleanse Your Eye Area
Start by gently cleansing your eye area to remove any dirt, oil, or residual makeup. This step ensures that your gel eyeliner glides on smoothly and adheres well to your skin. Use a gentle cleanser specifically designed for the delicate eye area, or opt for a micellar water that is suitable for sensitive skin.
Step 2: Moisturize and Prime
After cleansing, apply a lightweight eye cream to hydrate and nourish your skin. This step helps prevent any dragging or tugging during the gel eyeliner application process. Allow the eye cream to absorb fully before moving on to the next step.
Next, apply an eyeshadow primer to your lids. This product creates a smooth and even base for your gel eyeliner, ensuring that it stays in place and lasts all day. Choose a primer that complements your skin tone or opt for a translucent formula.
Step 3: Apply a Base Eyeshadow (Optional)
Applying a base eyeshadow is an optional step but can enhance the overall look of your gel eyeliner. Choose a neutral shade that matches your skin tone or complements your chosen eyeliner color. Sweep the eyeshadow across your entire lid using a fluffy brush, blending it seamlessly into your crease.
Step 4: Gather Your Tools
Now that your eyes are prepped and ready, it's time to gather your gel eyeliner tools. You'll need:
- A high-quality gel eyeliner product
- A small angled brush or fine-tipped eyeliner brush
- A clean cotton swab or makeup sponge for correcting mistakes
With these tools in hand, you're all set to create a stunning gel eyeliner look that lasts all day and night.
Properly prepping your eyes for gel eyeliner application is crucial for achieving a flawless finish. By following these simple steps, you'll be well on your way to mastering the art of gel eyeliner and creating eye-catching looks that turn heads wherever you go.
Essential Tools for a Flawless Application
Gel eyeliner has become a must-have item in many makeup collections, thanks to its versatility and ability to create stunning eye looks. To achieve the perfect application, it's essential to have the right tools at your disposal. In this article, we'll discuss the key tools needed for applying gel eyeliner like a pro.
The Must-Have Tools for Gel Eyeliner Application
To ensure a smooth, precise, and long-lasting gel eyeliner application, make sure you have these essential tools on hand:
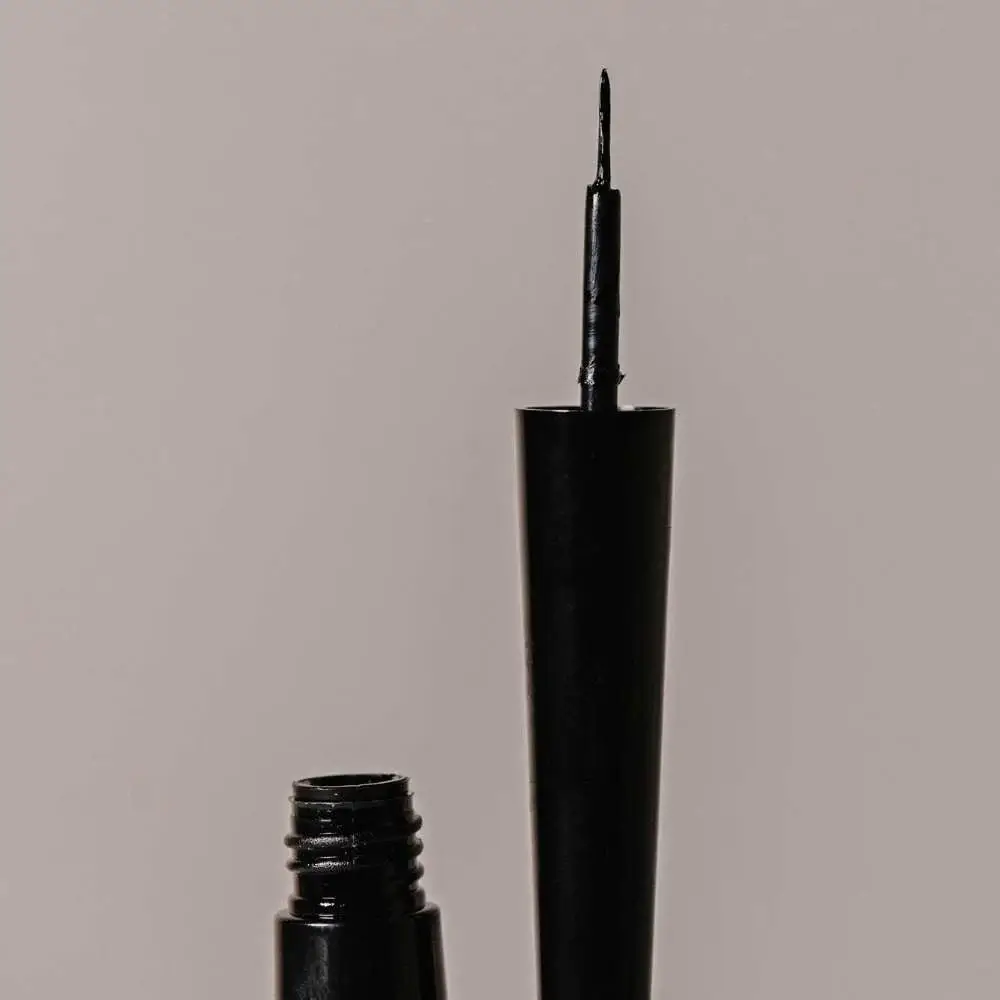
1. High-Quality Gel Eyeliner
The first and most crucial tool is, of course, a high-quality gel eyeliner. Look for a product with a smooth, creamy consistency that glides on easily and offers rich pigmentation. This will help you achieve a flawless finish and ensure your eyeliner stays in place all day.
2. Angled Brush or Fine-Tipped Eyeliner Brush
The brush you choose for applying your gel eyeliner can make all the difference in the final result. Opt for a small angled brush or a fine-tipped eyeliner brush to ensure precision and control during application. Synthetic bristles are often recommended, as they tend to hold up better when used with creamy gel formulas.
3. Eyeshadow Primer
An eyeshadow primer is an essential tool for prepping your eyelids before applying gel eyeliner. This product creates a smooth, even base that helps your eyeliner adhere to your skin and prevents smudging or fading throughout the day. Choose a primer that complements your skin tone or opt for a translucent formula.
4. Makeup Sponge or Cotton Swab
Mistakes happen, and having a makeup sponge or cotton swab on hand can save the day when it comes to gel eyeliner application. Dampen the sponge or swab with makeup remover to gently erase any smudges or uneven lines and achieve a clean, polished look.
5. Eyeshadow or Translucent Powder
To set your gel eyeliner and ensure it stays put all day, you'll need an eyeshadow or translucent powder. Pat the powder over your eyeliner using a small, flat brush, being careful not to smudge your line. This step helps lock your eyeliner in place and prevents it from transferring or creasing.
6. Tweezers (Optional)
If you're applying false lashes to complement your gel eyeliner look, a pair of tweezers can be helpful for precise placement and adjustments.
By having these essential tools in your makeup arsenal, you'll be well-equipped to apply gel eyeliner with confidence and ease. With practice and the right tools, you'll soon master the art of gel eyeliner application and create stunning eye looks that last all day.
Mastering the Art of a Flawless Finish
Gel eyeliner has taken the beauty world by storm, becoming a staple in makeup bags everywhere. Its creamy consistency and long-lasting formula make it perfect for creating bold, dramatic eye looks that last all day. In this article, we'll explore a step-by-step guide on how to apply gel eyeliner for a flawless finish every time.
Step-by-Step Guide to Applying Gel Eyeliner
Follow these steps to achieve a stunning gel eyeliner look that's sure to impress.
Step 1: Choose Your Gel Eyeliner and Brush
The first step in applying gel eyeliner is selecting the right product and brush for your desired look. Opt for a high-quality gel eyeliner with a smooth consistency and rich pigmentation. When it comes to brushes, choose a small angled brush or a fine-tipped eyeliner brush for precise application.
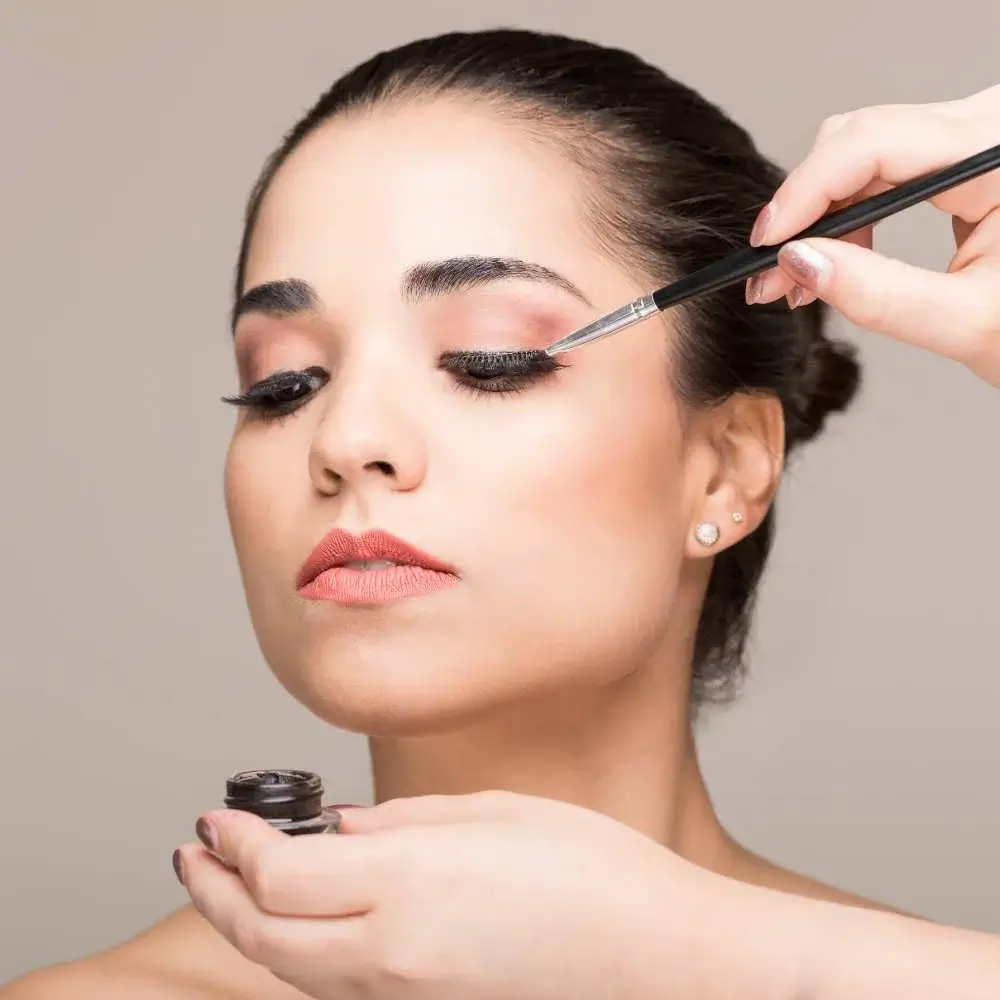
Step 2: Dip Your Brush into the Gel Eyeliner
Dip the tip of your brush into the gel eyeliner pot, picking up a small amount of product. Be careful not to overload your brush, as this can lead to messy application and smudging. You can always add more products later if needed.
Step 3: Create a Guideline
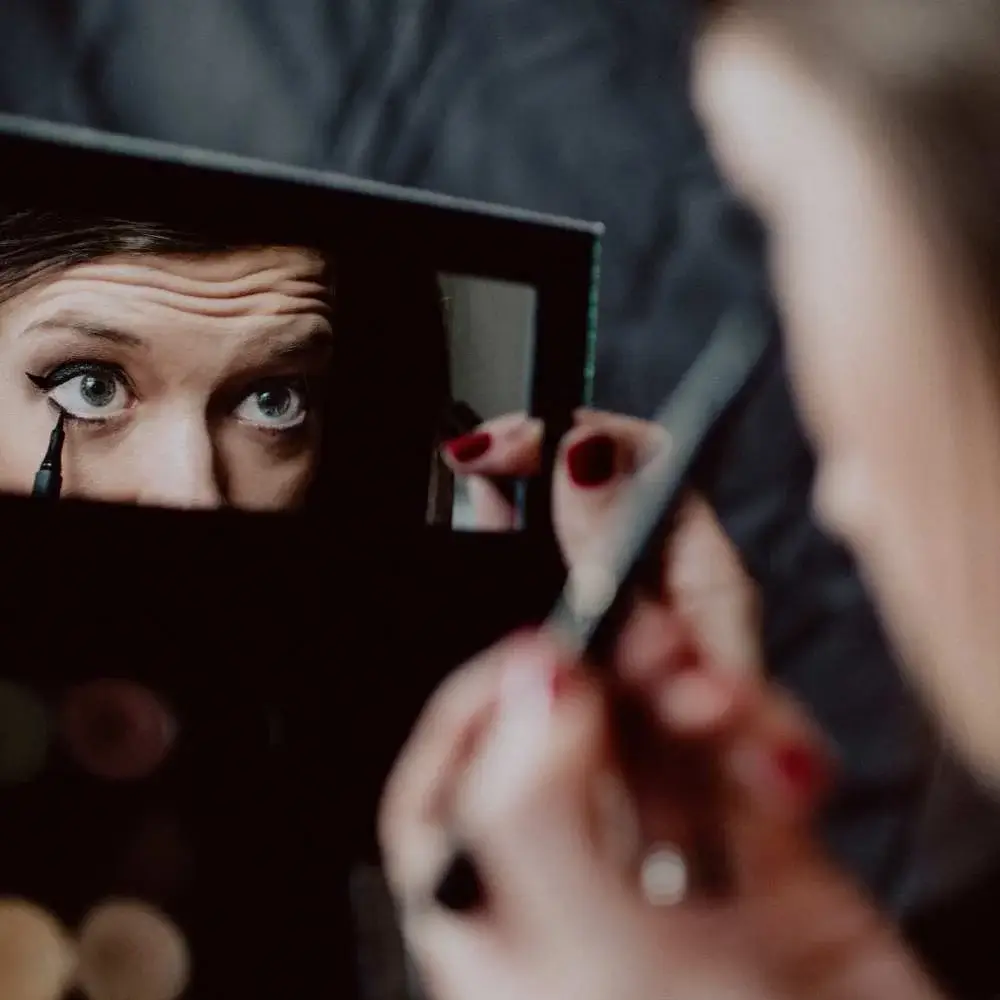
To ensure a straight and even line, start by creating a guideline along your upper lash line. Begin at the inner corner of your eye, and lightly draw a thin line along your lashes. This step helps you establish the shape and direction of your eyeliner.
Step 4: Build and Define Your Line
Once you have your guideline in place, it's time to build and define your gel eyeliner line. Start at the outer corner of your eye and work your way inward, connecting the dots along your lash line. Use short, feathery strokes to create a smooth, even line. You can gradually increase the thickness of your line as you move towards the outer corner for a more dramatic look.
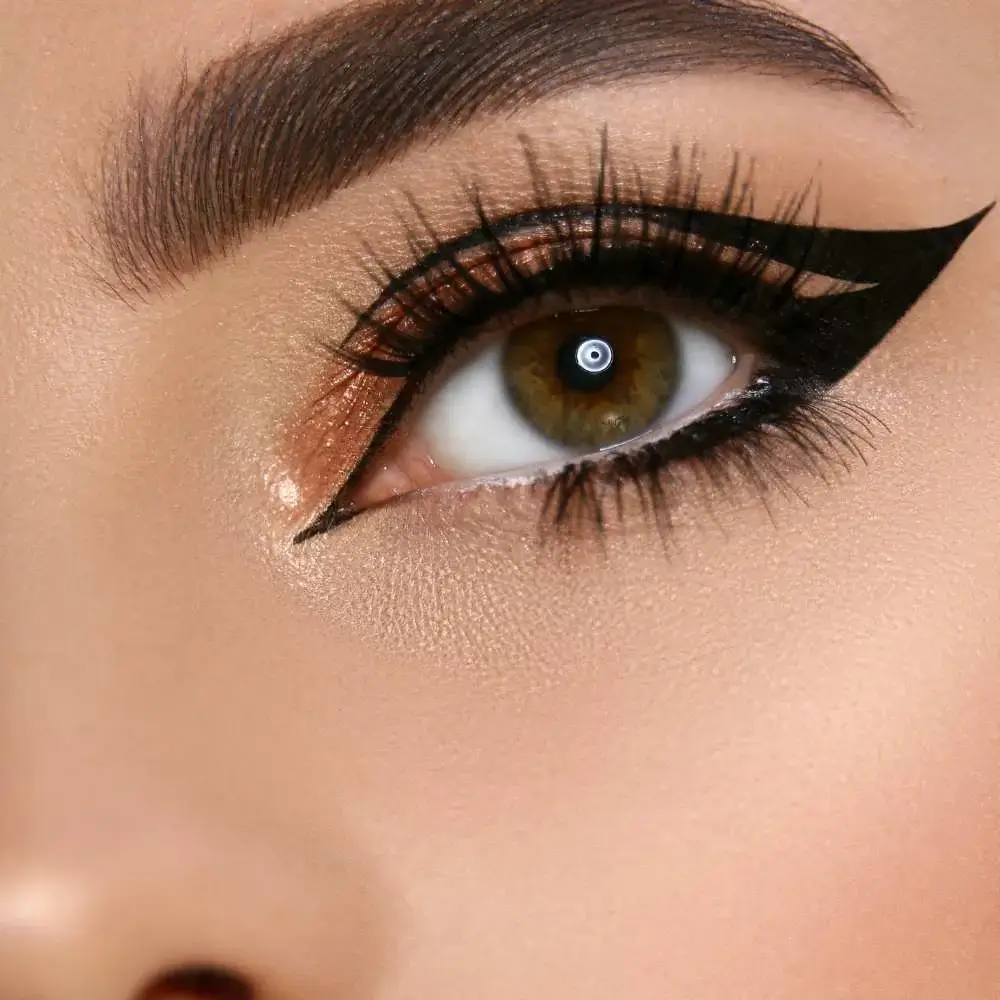
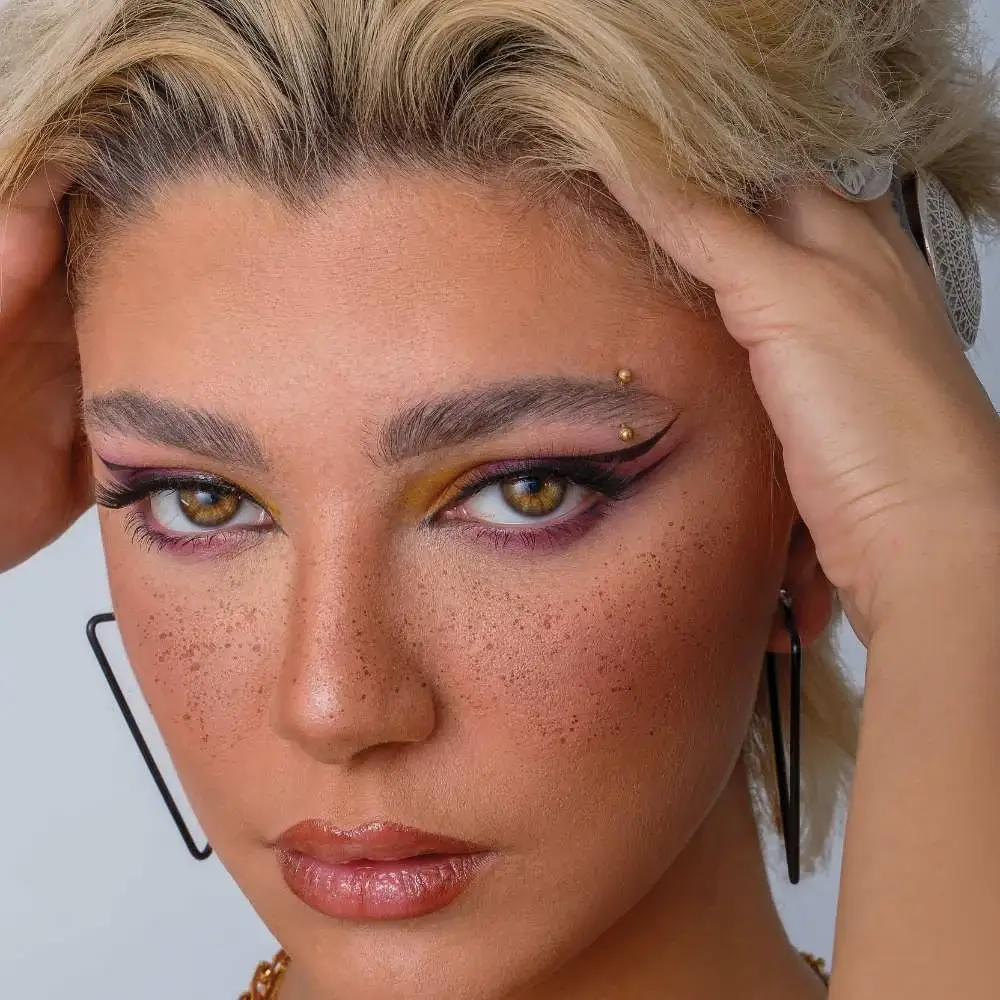
Step 5: Create the Perfect Wing (Optional)
If you want to add a wing to your gel eyeliner look, follow these steps:
- Extend your eyeliner from the outer corner of your eye, angling it upward towards the tail of your eyebrow.
- From the tip of your wing, draw a line back towards your eyelid, creating a small triangle.
- Fill in the triangle with your gel eyeliner and blend the edges to create a seamless wing.
Step 6: Clean Up and Correct Mistakes
If you've made any mistakes or need to clean up your gel eyeliner, use a cotton swab or makeup sponge dipped in makeup remover to gently erase any smudges or uneven lines. Be sure to do this before your eyeliner dries to ensure easy removal.
Step 7: Set Your Gel Eyeliner
To ensure your gel eyeliner stays put all day, set it with a matching eyeshadow or translucent powder. Use a small, flat brush to gently pat the powder over your eyeliner, being careful not to smudge your line.
By following this step-by-step guide, you'll be well on your way to mastering the art of gel eyeliner application and achieving a flawless finish every time. So go ahead, unleash your creativity, and experiment with different gel eyeliner looks to find your signature style.
Now that you know how to apply gel eyeliner like a pro, there’s nothing stopping you from creating beautiful eye makeup looks that will last all day long! Just remember to start with a clean base, choose the right formula, and pick the perfect brush, and you’ll be well on your way to achieving flawless results.
In summary, gel eyeliner has earned its place as a must-have product in the makeup world. Its versatility, long-lasting wear, and ability to create an array of eye-catching looks make it a favorite among beauty enthusiasts. From choosing the right formula and brush to mastering the application technique, there's no doubt that gel eyeliner can elevate your makeup game to new heights.
By following the tips and advice shared throughout this comprehensive guide, you'll be well on your way to becoming a gel eyeliner pro. So go ahead, unleash your creativity, and experiment with different styles, brushes, and techniques to discover your signature gel eyeliner look. Whether you're a seasoned makeup artist or just starting to explore the world of gel eyeliner, this powerhouse product is sure to become your go-to for stunning eye makeup that lasts all day and night.
FAQs About Gel Eyeliner
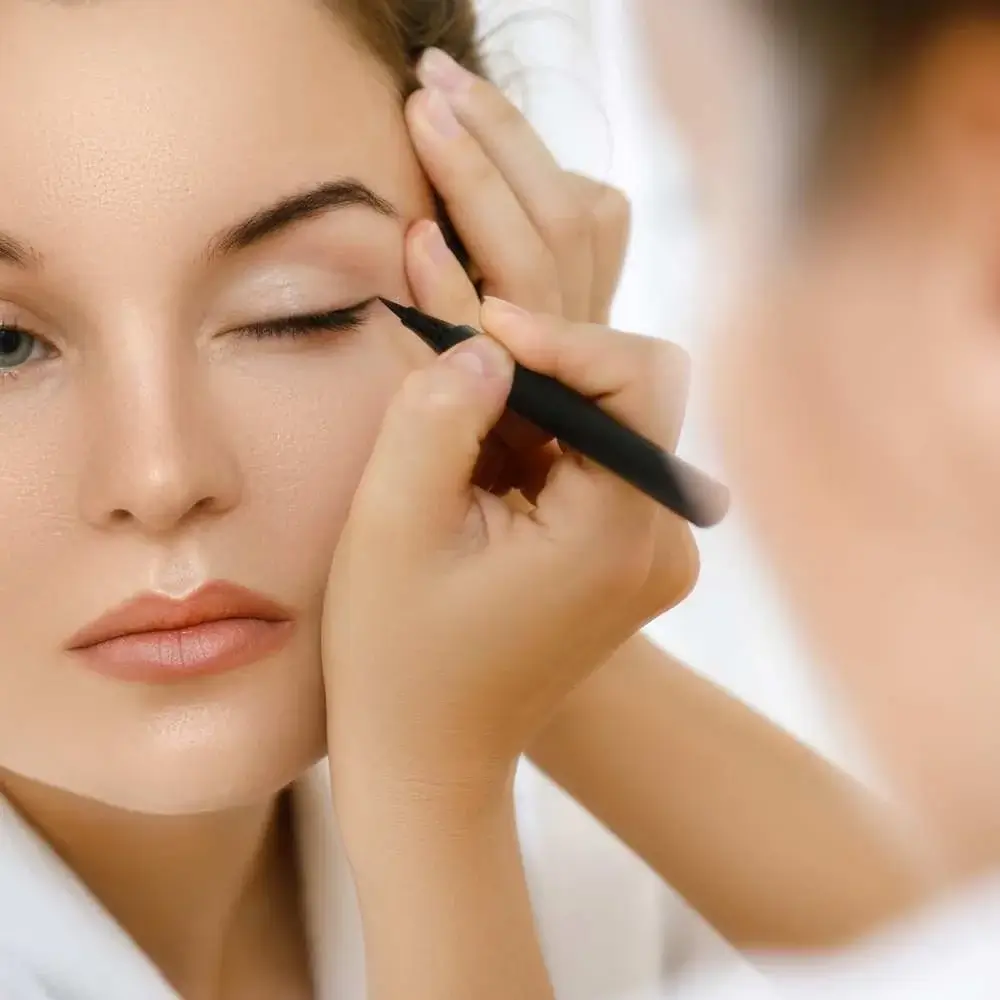
What is the best way to apply gel eyeliner for a smooth line?
First, make sure you're using a top-notch gel eyeliner with a creamy, dreamy consistency. Next, grab your trusty angled brush or fine-tipped eyeliner brush - they're your partners in crime for precision and control. Now, steady your hand by resting your elbow on a flat surface and lightly sketch a guideline along your upper lash line, starting from the inner corner. Then, channel your inner artist and use short, feathery strokes to connect the dots and create that oh-so-smooth line. Remember, practice makes perfect, so keep playing with your gel eyeliner, and you'll be rocking those flawless lines in no time!
How do I choose a brush for applying gel eyeliner?
The key is to find the perfect brush BFF that matches your eyeliner style and skill level. If you're new to the gel eyeliner game, a bent liner brush is your go-to buddy, offering extra control and easy maneuverability. For those who crave bold, dramatic lines, a flat liner brush is ready to join your makeup squad – it's all about color in a single swipe! And if precision is your middle name, a fine-tipped eyeliner brush will help you create those intricate designs or ultra-thin lines with ease. So go ahead, explore the world of brushes, and soon enough, you'll have a brush soulmate that makes applying gel eyeliner a piece of cake!
How can I create a winged eyeliner look with a gel product?
Start by choosing a fabulous gel eyeliner and an angled or fine-tipped brush for precision. Now, imagine a line extending from the outer corner of your eye towards the tail of your eyebrow - that's your wing's direction! Next, draw a small diagonal line from the outer corner, following that imaginary line. Once you've got your wing's tip, it's time to connect it back to your upper lash line, creating a little triangle. Fill in the triangle and glide the gel eyeliner along your upper lash line, starting from the inner corner. Voilà! You've created a show-stopping winged eyeliner look with your trusty gel product. Remember, practice makes perfect, so keep flexing those wings and soon you'll be soaring through the makeup skies!
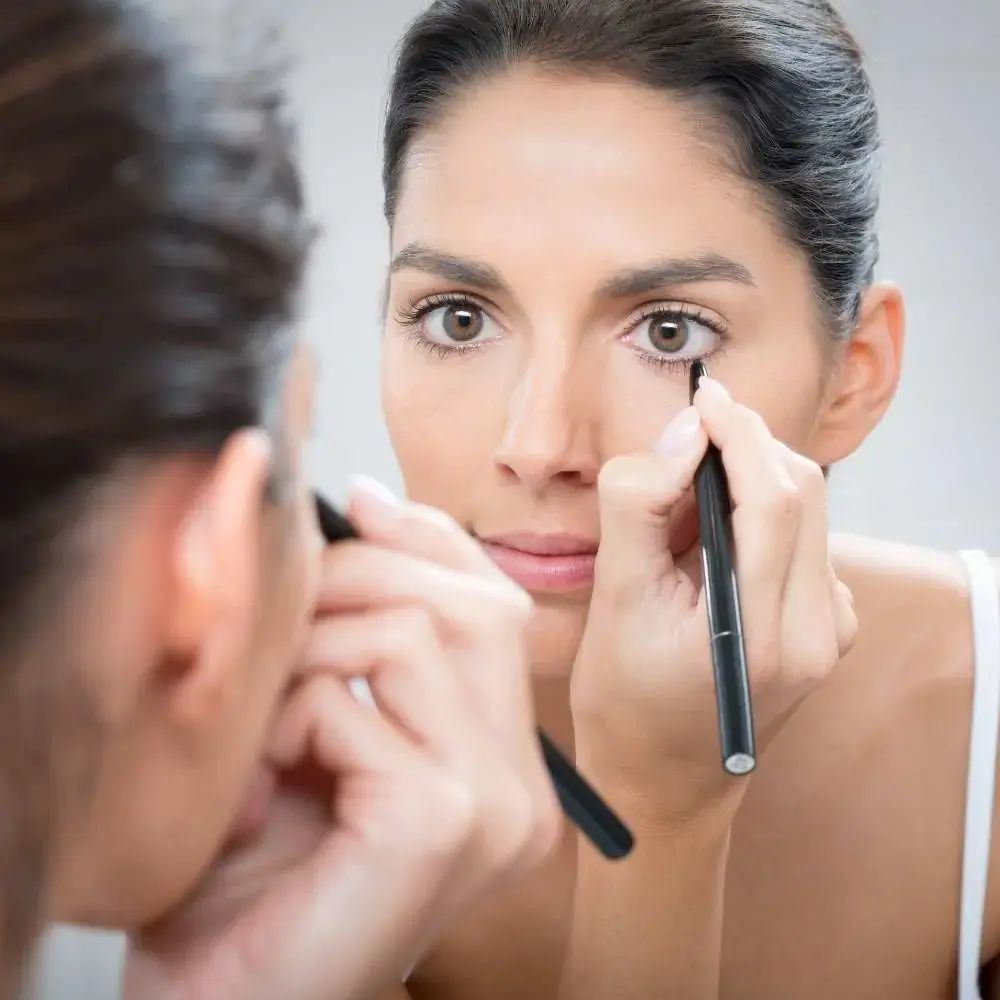
Is gel eyeliner suitable for the waterline?
Absolutely! Gel eyeliner is an excellent choice for the waterline, thanks to its long-lasting, smudge-proof properties. Just make sure you pick a gel eyeliner that's specifically labeled as safe for waterline use or ophthalmologist-tested to avoid any irritation. Now, grab your favorite fine-tipped or flat liner brush and gently pull down your lower lid to expose the waterline. Carefully dab the gel eyeliner onto your waterline, making sure not to poke your eye. And there you have it - a beautifully defined waterline that's ready to make your eyes pop with the magic of gel eyeliner!
How do I remove gel eyeliner without irritating my eyes?
The secret weapon here is a gentle, oil-based makeup remover or micellar water. First, dampen a cotton pad or soft, lint-free cloth with your chosen makeup remover. Then, close your eyes and gently press the pad against your eyelids for a few seconds, allowing the product to break down that long-lasting gel eyeliner. Now, channel your inner Zen master and calmly wipe the pad away from your eye in a smooth motion - no rubbing or tugging allowed! Repeat these steps until all traces of gel eyeliner are gone, and voilà! You've successfully removed your eye makeup without causing any irritation. Remember, be gentle with your eyes, they deserve some TLC after rocking that stunning gel eyeliner look all day!
Read our article about best hypoallergenic eyeliner here!
Read our article about best makeup brush cleaner here!
Read our article about best cruelty free lipstick here!